You have found your faithful boat for the season. Even if the new antifouling gives it a youthful look, there is still that hull that has faded over the years. That's the life of a gel coat, as it ages, it tarnishes and always looks dirty.
In fact, it has become porous, and if your hull is blue or red, the traces of alteration are worse. Indeed, the more pigments the gel-coat contains, the more they will tend to disappear on the surface. On a microscopic view, you would observe that the surface is not smooth, it is full of pits and peaks.

The sign that does not deceive are the traces remaining on the hand after having caressed the shell. In this case, no doubt, the gel-coat has become floury.
To revive the color of the hull and regain the shine of yesteryear, the remedy is simple, it is the polishing of the hull. In fact, it is a very fine sanding of the gel coat, allowing to recover its shine. If your boat is old and has a very floury gel coat, you will have to use several types of polish, from the thickest grain to the finest.

To perform the polishing of your hull, you will need
- A polishing machine
- An extension cord
- Of polish
- A spatula and rags
- A stable stepladder
- Personal protection: gloves and glasses
Degrease the hull
We recommend cleaning with a soft brush using a cleaning and degreasing product that you will rinse with water. Once clean, let the hull dry well before applying the polish.
Apply polish
To apply the polish, there are two schools.
You can spread the product on the hull with a cloth on the area to be treated (maximum 1 min 2 s). Then use the polisher. To obtain a good result, it will be necessary to put a uniform quantity of material.

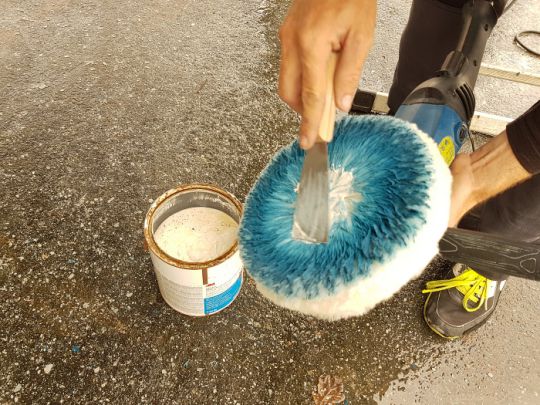
You can also put a little polish in the center of the sheepskin (that's the name given to the material lining the polisher tray). Do not put any on the periphery of the tray, as the centrifugal force would eject the product in all directions.
Let's go, let's polish!
Apply the device on the shell, hold it firmly and start it. Apply a little pressure on the machine and keep it flat, you have to square the area, from top to bottom and from right to left.
When the shine reappears, let the sheepskin turn faster by reducing the pressure. This allows you to wipe off the residual product, and avoids doing it by hand.

There is no need to press hard on the polisher, it is the rotation and abrasion of the product that will do the work, not the power of your muscles. In any case, your arms and shoulders will already be holding the machine. Indeed, the speed of rotation can cause the machine to slip out of your hands.
The work can be finished with a specific wax to give extra protection.

Tips from the pros
Kevin, an experienced hull renovation technician, gives us his tip for more efficiency.
"To remove residual polish, I always go in the same direction. My machine has a clockwise rotation, so I always go from right to left. The sheepskin pass leaves almost no residual traces =polish. I save a lot of time this way."

 /
/ 


