Rigging a windsurf sail with cambers, unlike a conventional sail, requires careful attention to detail, both to preserve the integrity of the material and to optimize performance on the water. Proper installation not only avoids common mistakes, but also preserves the longevity of battens and cambers, while ensuring perfect rig tension. This guide will take you through the process, step by step, to successfully rig your sail without stress or risk of damage.
1. Choosing a suitable rigging area
Before you start rigging, the first precaution is to choose a clean, non-abrasive area. For a cambered sail, this aspect is all the more crucial as the cambers, which exert pressure on the sail, can easily deteriorate if you work on a rough surface. A well-smoothed sand slab, a fine sandy beach, a grassy area or even a clean tarpaulin are ideal choices: this small gesture helps protect both sail and cambers from premature damage.
Be sure to unfurl your sail with your back to the wind.
2. Insert mast into sheath without cambers
The next step is to slide the assembled mast into the sail sleeve without immediately positioning the cambers. It's important not to pull excessively on the mast sleeve, as this could make insertion more difficult. Care must be taken to insert the mast over the battens without forcing it, to avoid any pressure on the battens, which could damage them. Don't be hasty: the aim is to have the mast firmly in place before moving on to the next step.
3. Apply the correct tack tension
Once the mast is in place, the tack tension must be carefully adjusted. This is a delicate step, as the tension must be strong enough to bend the mast and reduce the hollow of the sail, while allowing easy access for positioning the cambers.
Start by inserting the ropes into the tack blocks. Make sure they are well positioned so as not to impede their action. Gently pull on them while observing the curvature of the mast. The aim is to achieve a tension that allows the mast to bend slightly, thus reducing the hollow of the sail, while maintaining a certain flexibility throughout the rig.

Be careful not to over-tension the tack lines: too much tension will make the sheath too tight and could complicate installation of the cambers. If the tension is too low, the mast will not bend sufficiently and the hollow will remain too pronounced, affecting the sail's performance.
Once this tension has been adjusted to a medium level, the sail will be ready to receive the cambers under optimum conditions. This adjustment is essential to ensure that the cambers fit correctly and that the sail's profile is balanced.
4. Placing the boom
Before installing the cambers, it's advisable to fit the boom to the recommended size and thread it onto the sail. Once fitted, close the front handle on the mast. This will make it easier to fit the cambers and allow you to lay the sail on the ground without breaking the fragile battens.

5. Positioning the cambers
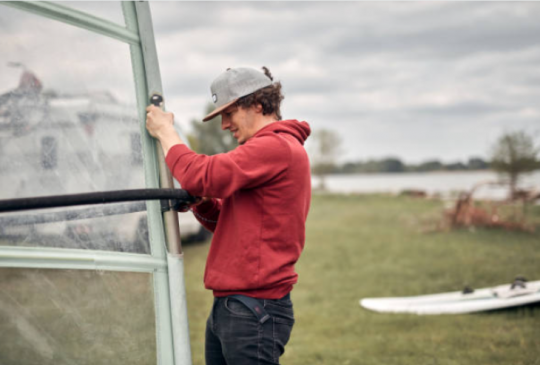
To position the cambers, start at the boom window. Install them one at a time, starting with those around the window and ending with the bottom camber. To do this, push down on the batten at the hollow of the sail with one hand and apply pressure to the end of the camber with the other to bring it into the correct position against the mast.
6. Apply tack tension
Once the cambers are in place, it's time to re-apply tension to the tack. There are a number of techniques for this adjustment, such as using the harness loop or the harness in the sailing position to push with the legs. Be careful, however, not to deform the buckle by exerting too much force. The use of a spreader can be an excellent choice to facilitate the operation.

7. Attaching the grommet
Once the tack has been tensioned, it's time to attach the clew eye. At this stage, the tension should be light, just 1 to 2 cm, so that the shape of the sail profile is already determined by the cambers. The aim is to hold the sail in place without pulling excessively on the boom, as this could break the sail's profile. When under pressure, the sail should only lightly touch the boom.

8. Fine-tuning final settings
Once the rig is firmly in place, the final adjustments must be made to optimize the shape of the sail. One of the most important adjustments concerns tack tension, particularly in the lower part of the sail.
The aim is to adjust the tension so as to flatten the top of the sail, allowing the leech (the rear part of the sail) to open properly. To achieve this, it may be necessary to "soften" (reduce the tension) on half of the second panel of the sail, from the top, to obtain a smoother, more balanced profile. This adjustment is essential to avoid excessive hollowing and ensure good propulsion. Some sails are equipped with specific markings on the battens or wires, which indicate the ideal tension to be applied for each area of the sail.
Finally, if your sail is equipped with a strap on the edge (the bottom of the sail), it can be useful to pull it slightly. This adjusts the hollow at the bottom of the sail and refines its shape for better control and performance.

Rigging a windsurfing sail with cambers is not impossible, provided you follow these steps carefully. Every detail, from preparing the area to tensioning the elements, is important to avoid damaging the equipment and guarantee optimum performance at sea. By applying these tips, you'll be able to take control of your rig with complete peace of mind, and make the most of your windsurfing sessions.

 /
/ 

