Basic problem
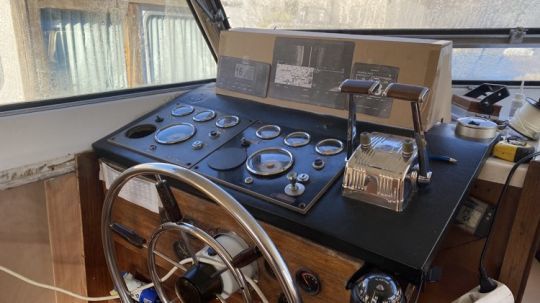
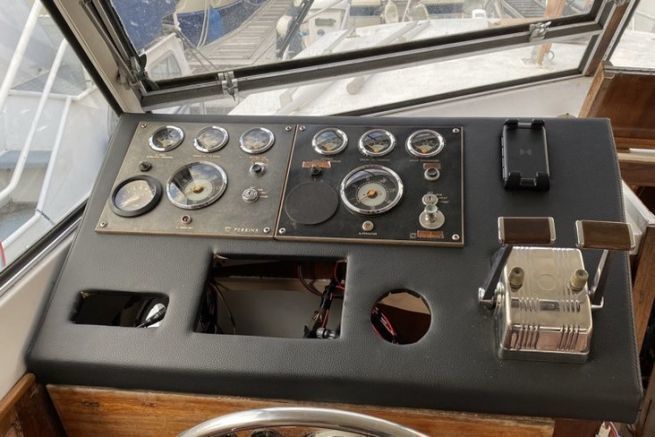
The Amerglass is a boat that dates from 1973. The dashboard is limited to engine control instruments (temperature gauge, pressure gauge and tachometer mainly). But this arrangement leaves no room for adding electronic displays. So I have to find a solution, because on this boat I intend to install a chartplotter that also serves as a depth sounder, a screen for the autopilot and a VHF. Not wanting to alter the console too much, I want to keep the old Perkins engine screens installed on two bakelite plates that I find aesthetic. All the electronic devices will come from Garmin (VHF 115i, 923 XSV plotter, GHC20 autopilot console). I voluntarily limit myself to a 9" plotter so as not to have too big a screen to integrate.
Cardboard templates
I start by imagining positioning the 3 Garmin devices on the top of the console. To remain readable, they must be installed almost vertically so that the helmsman can see them. So I made a cardboard template with prints of the screens at scale 1 to see the result. I quickly see that the screens are well readable, almost too much so since they block part of the view towards the front! The added console is too imposing.
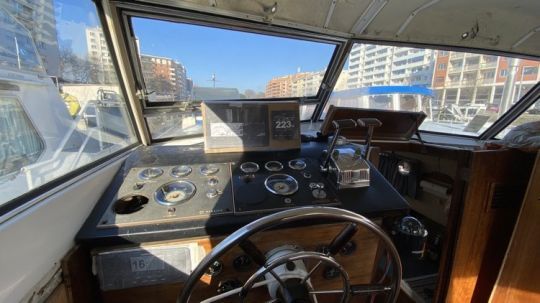
For the second attempt, I reduced the planned console to a width, keeping only the plotter and the pilot on top. The VHF then finds its place under the dashboard. A place that suits it well, even if I'm not sure it can fit deep inside, given the bathroom cabinet under the console. But I don't like this general layout, because the plotter screen is always far from the bar and the manipulation of the touch screen at arm's length is not easy. I need to find another layout...
I also imagined installing the VHF and the pilot suspended from the ceiling, above the windshield. But I haven't found a viable solution that doesn't block the view when you're standing in the cockpit, as the ceiling isn't very high. With my 1.84 m, I can barely stand without touching the ceiling.
General dismantling!
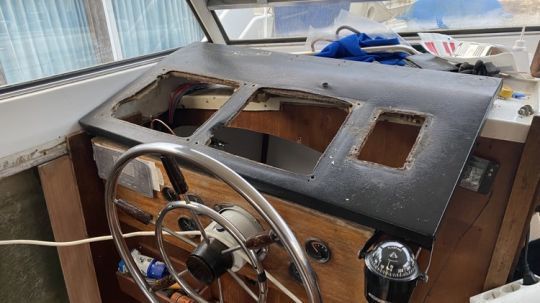
Finally, I dismantle the entire dashboard. To rethink it in its entirety. The engine control panels and the throttles are dismantled. We're going to make everything new again!
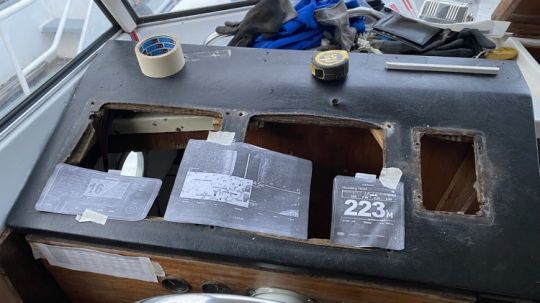
Almost involuntarily, I place the electronics right in front of the bar. And it's a revelation! Thus the plotter becomes totally readable even without tilting it, since it is dominated and can be read by lowering the head. You just have to "push" the engine control panels upwards. They do not require the same readability.
Carpentry
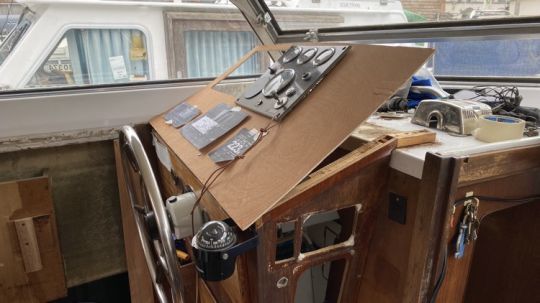
I make a first "blank" assembly with a 5 mm plywood without value and easy to cut. This allows me to see where the wires go, and also how high I need them to be so that all this little world can fit without worry.
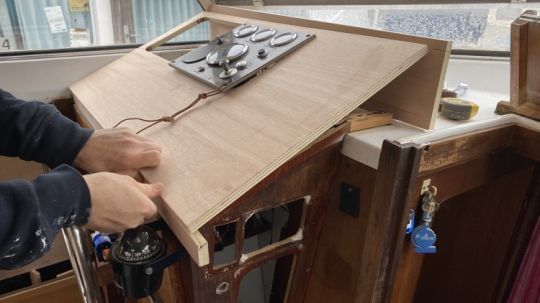
The final dashboard will be made of 15 mm marine plywood. I position the different elements to see if everything will fit and if the whole is well done.
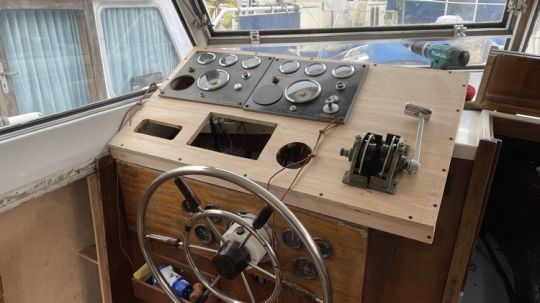
Here are the first tests of the final dashboard. I check that my instruments fit well and that the throttles can be mounted. To make the whole thing take less space in the passage, I'll cut the bottom right corner again. Once the carpentry part is finished, I have to move on to the aesthetic part with a black leatherette upholstery to get the original look.
It is at Serge Ferrari, a French fabric manufacturer specialized in outdoor products that I will find the imitation leather. It's a PVC product that is stretchy enough to cover the surfaces well and above all that doesn't fear the sun or dirt (Stanskin Top Noir Club). Ideal for my dashboard.
To make the 2 seams on each side of the dashboard, we asked Sellerie Not in Toulouse (a saddlery specialized in old cars and boats equipments). They made us a very elegant double stitching in black thread. It follows perfectly the 2 corners of the dashboard.
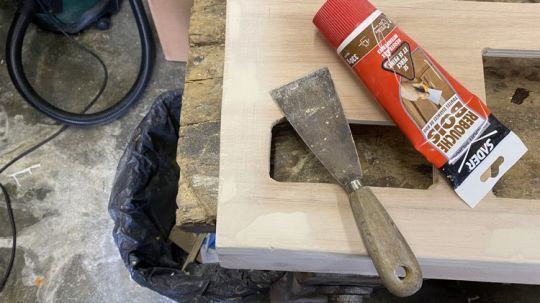
Before installing the fabric, I fill the holes caused by the screws with wood paste. This way the surface will be perfect when the fabric is stretched on it. I purposely leave the edges sharp enough so that the corners are perfect.
The saddlery finish
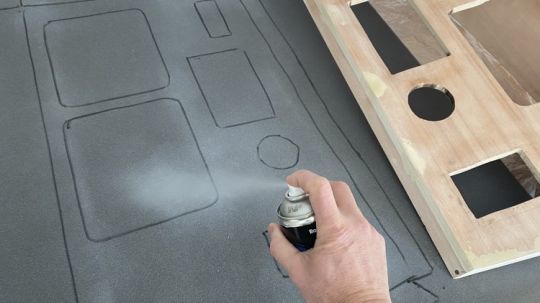
Before putting the skai, I will glue with neoprene glue in spray, a small fine foam (about 3 mm) which will give a feeling of "comfort" when you lean on the dashboard. The instruments will also be slightly embedded in the fabric for a more aesthetic look.
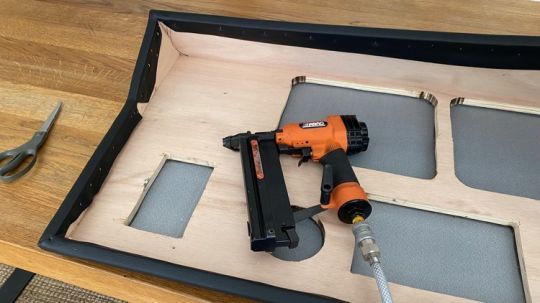
The skai is turned over and stapled all around the dashboard. Before that, it must be stretched well. An operation that requires a little precision to achieve the desired finish. Each opening, the places of the instruments, is also cut and turned over to be stapled inside. This way there is no risk that over time the fabric will slip and the wood will appear under the instruments.
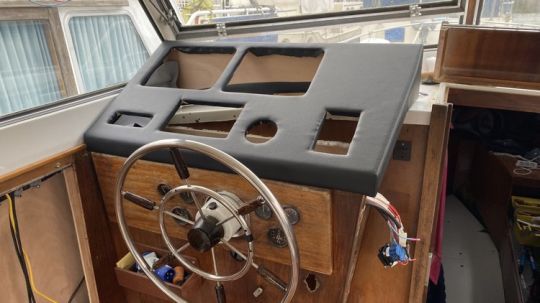
Back on board for the first tests. The result satisfies us enough...
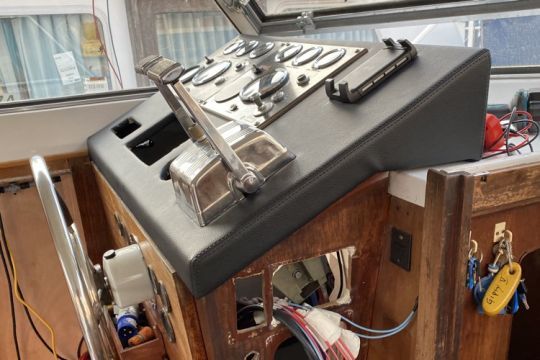
The dashboard is definitely screwed in from below. Then, it is the installation of the engine controls. It does not remain any more but to await the electronic instruments of Garmin to complete definitively the new installation.
